If you use iMessage to send and receive audio messages on your iPhone, you might wonder where those messages are stored and how to access them later. Audio messages are a convenient way to communicate with your friends, family, or colleagues, but they can also take up a lot of space on your device. In this article, we will explain where saved audio messages go on iPhone, how to manage them, and how to back them up and restore them.
Default Location of Saved Audio Messages
A. Exploring the Messages app
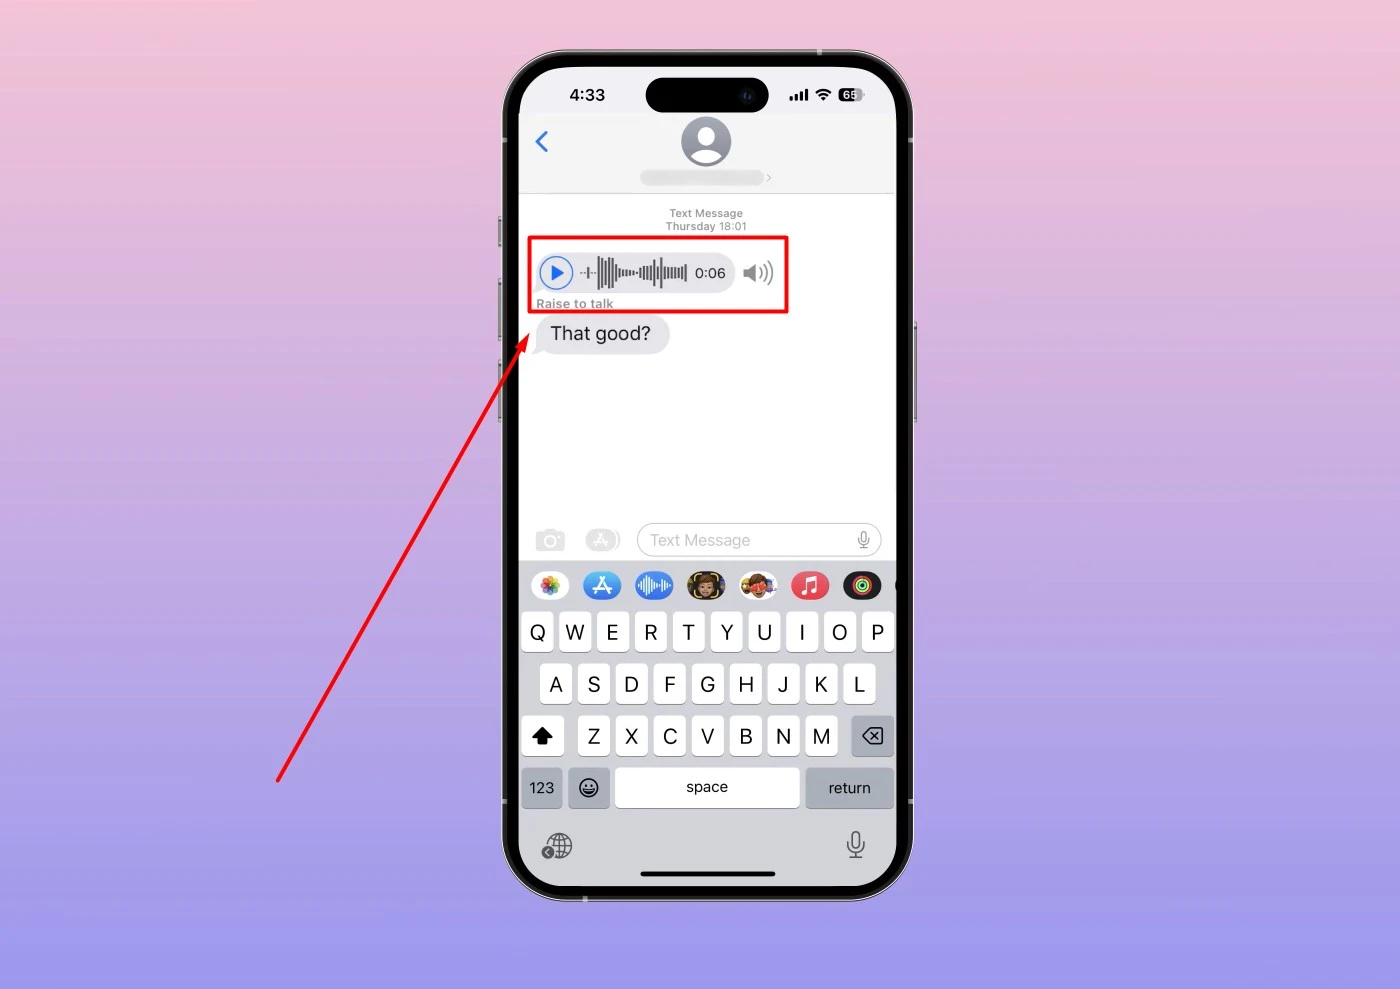
The default location of saved audio messages on iPhone is the Messages app. You can find them by opening the app and tapping on the conversation that contains the audio message. You will see a blue play button next to the message that indicates it is an audio file. To listen to it, tap on the play button.
B. Locating the audio message attachments
If you want to see all the audio messages that you have sent or received in a conversation, you can tap on the “i” icon at the top right corner of the screen. It will show you the details of the conversation, including all the attachments. You can scroll down to see the audio messages section and tap on any message to play it.
C. Accessing saved audio messages

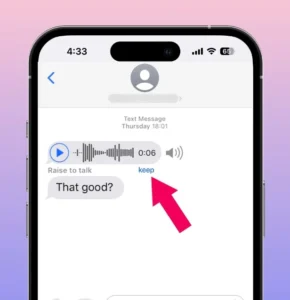
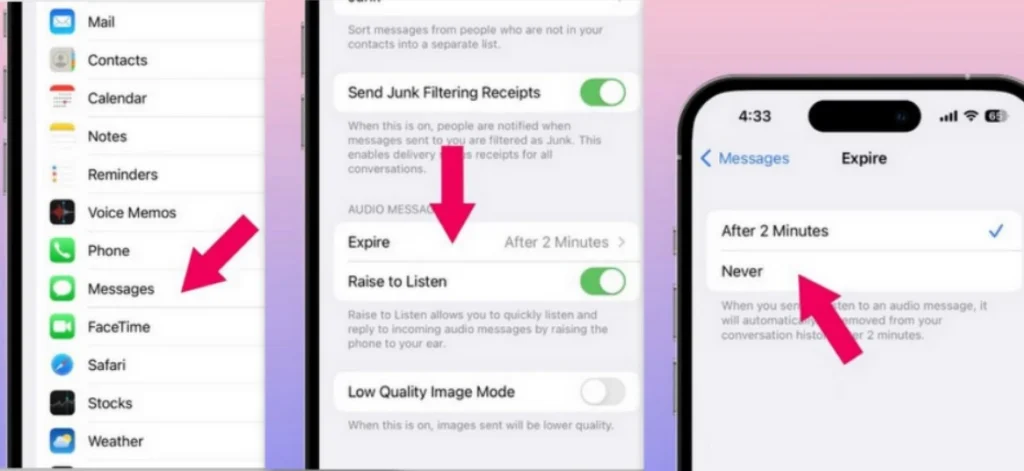
By default, audio messages will expire and be deleted 2 minutes after you listen to them. That is to save storage space on your device and prevent cluttering your conversations. However, you can save them by pressing the Keep button below the audio message clip or setting them to Never Expire in the Settings app. To do this, go to Settings > Messages > Expire > Never.

It will allow you to access your saved audio messages anytime in the Messages app.
Managing Saved Audio Messages
A. Organizing audio messages in the Messages app
If you have a lot of saved audio messages in the Messages app, organize them by deleting or archiving some of them. To delete an audio message, swipe left on it and tap on the Delete button. To archive an audio message, swipe left on it and tap on the More button. Then, tap on the Archive button at the bottom left corner of the screen. This will move the message to a separate folder that you can access by tapping Edit > Archived Messages at the top left corner of the screen.
B. Deleting or archiving audio messages
You can also delete or archive multiple audio messages at once by tapping on Edit > Select Messages at the top right corner of the screen. Then, tap on the circles next to the messages that you want to delete or archive, and tap on Delete or Archive at the bottom of the screen.
C. Setting storage preferences for audio messages
Another way to manage your saved audio messages is to set storage preferences for them in the Settings app. You can choose how long you want to keep your audio messages before they are automatically deleted from your device. To do this, go to Settings > General > iPhone Storage > Messages > Audio Messages. You will see a list of options ranging from 30 days to Forever. Tap on the option that suits your needs.
Backing Up and Restoring Audio Messages
A. Importance of backing up audio messages
If you have important or sentimental audio messages that you want to keep forever, you should back them up regularly. This will ensure that you don’t lose them if your device is lost, stolen, damaged, or erased. Backing up your audio messages will also free up some space on your device by storing them in a secure cloud service.
B. Using iCloud or iTunes for backups
There are two main ways to back up your audio messages: using iCloud or iTunes. iCloud is a cloud service that automatically backs up your data over Wi-Fi when your device is plugged in and locked. To use iCloud for backups, go to Settings > [your name] > iCloud > iCloud Backup and turn it on. You can also manually back up your data by tapping on Back Up Now.
iTunes is a software that allows you to back up your data using a computer. To use iTunes for backups, connect your device to your computer using a USB cable and open iTunes. Then, click on the device icon and select Back Up Now under Summary.
C. Restoring audio messages from a backup
If you need to restore your audio messages from a backup, you can do so using iCloud or iTunes as well. To restore from iCloud, go to Settings > General > Reset > Erase All Content and Settings. This will erase your device and prepare it for the restore. Then, follow the onscreen instructions and choose Restore from iCloud Backup when prompted. You will need to sign in with your Apple ID and password and select the backup that contains your audio messages.
To restore from iTunes, connect your device to your computer using a USB cable and open iTunes. Then, click on the device icon and select Restore Backup under Summary. You will need to choose the backup that contains your audio messages and enter your password if it is encrypted.
FAQs
Conclusion
Audio messages are a great way to communicate with voice instead of text on your iPhone. However, they can also take up a lot of storage space and clutter your conversations if you don’t manage them properly. In this article, we have shown you where saved audio messages go on iPhone, how to manage them, and how to back them up and restore them. We hope this article has helped you understand how to use audio messages effectively and efficiently on your iPhone.

